Adding Potential Donors to the My Donor Spreadsheet (Iris does this!)
Emails in letters@borgenproject.org are opened and the list is checked for any issues. If all is well:
- Forward the email to letters@borgenproject.org
- When it arrives in the inbox, label it ‘Zap to My Donors’
The label will trigger the data to be sent to the My Donors spreadsheet.
If the data on the team member’s list needs amending, this can be updated directly on the My Donors spreadsheet.
If there are over 50 potential donor’s on the team member’s list, email/message your manager first.
Begin Here:
Create a Borgen Project Google Account
We use Google Chrome as our browser (it is an easy installation process if you do not use it already). In the top right-hand corner, next to the URL search engine, click on the tiny circle that most likely has your first initial in or your account photo. Then, click “Add” under “Other People” and create a “Borgen Project” account with the donors@ email address and password.
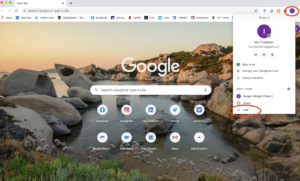
Note: You only have to do create an account one time. After you get it set up, you will have access to the donors@ Drive and Gmail. Make sure that you are logged into this Google Account instead of your personal account when you are processing fundraising letters.
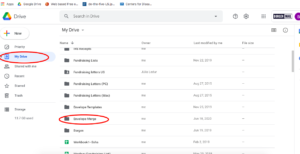
Now you will have access to the donors@borgenproject.org Google Drive, where you can access all of the relevant documents for the next steps.
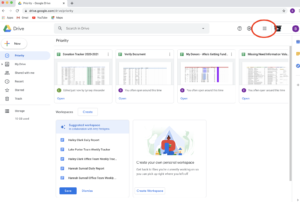
Open Verify Doc and My Donors Spreadsheet
Open the Verify Doc and at the bottom of the “Fundraising Letters Received” tab, fill out all of the relevant information you know immediately from looking at the letters you are working on. Usually, this will be the intern’s name, the date you are processing them, whether or not they included the checklist and your name.
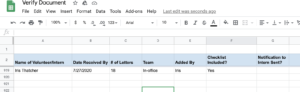
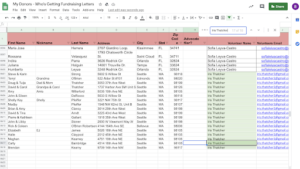
You will then access the My Donors spreadsheet for the remaining information. When accessing My Donors, Control –> F (on your keyboard) the volunteer’s name. You will find the intern’s position and the number of letters that they have in My Donors.
Review Team Member’s Fundraising Letter
When you first receive a package, take the time to look at the letters to make sure they are up to standard. Common issues we look out for:
- Missing The Borgen Project letterhead – this is an automatic redo of their letters. They must have the letterhead because it signifies that the letter is officially coming from The Borgen Project.
- A statement in the letter that says, “you don’t have to donate if you don’t want to”. The purpose of the fundraising letters is to fundraise, and with a statement like this, the recipients will feel less inclined to donate, even if they are able to. So, if we see this, we ask the volunteer to redo them.
- Missing the date at the top right corner, misspelling borgenproject.org, misstating that the money goes somewhere else, etc.
- The letters are wrinkly, look unprofessional, etc.
Usually, the volunteer will have gotten their template approved by us via email (letters@borgenproject.org). Nonetheless, before we start processing letters, we have to make sure that everything looks good to go. Otherwise, we will email them with feedback through our canned response “Fundraising Letters Received, Need New Letters”.
*Canned responses (predetermined and written responses) can be found when you click “Compose” at the top of the inbox. Then, in the bottom right-hand corner of the email, click on the 3 vertical dots. Here, you will find all of our canned responses. You will most likely need to edit these responses before sending them!
Create Fundraising Letter Envelopes
In donors@ Drive, click on “My Drive” and open the “Envelope Merge” Folder.
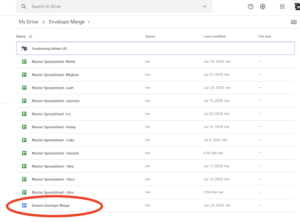
Open the Master Spreadsheet – Your Name and the Donors Envelope Merge.
In My Donors, copy and paste the team member’s potential donor list from the “First Name” column to the “Volunteer Name” column. In your Master Spreadsheet, paste the columns that you copied from My Donors.
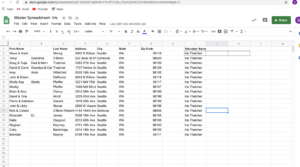
Make final edits to mailing addresses. Check for zeros in zip codes, use the correct address abbreviations where necessary, etc. If you don’t know if a certain abbreviation should be used, you can look here.
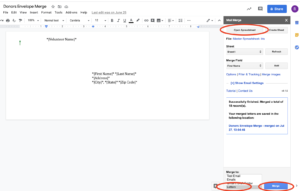
The spreadsheet will automatically save. Then, using the Donors Envelope Merge document, select “Add Ons,” “Mail Merge,” and then “Start” to create the envelopes.
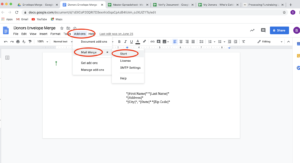
From there, a toolbar will be prompted. Select “open spreadsheet” on the right-hand side and search for your spreadsheet. Then, make sure that “letters” is selected in the “Merge To” box at the bottom and click “Merge”. It’ll ask you whether or not you want to process your selected records, and you will select “yes.”
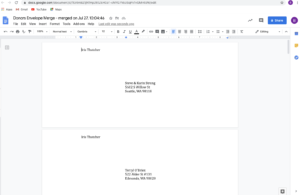
After the merge is complete, the toolbar will provide you a link to your envelopes. Scroll through each envelope and make sure that there are no spacing issues and that all the addresses are correct.
Print and Prepare Letters for Mailing
- Add blank envelopes to the printer by sliding them in face-down.
- The flap that seals the envelope must be facing up on the right-hand side of the printer. Otherwise, the mailing address will print upside down.
- Change the Print settings on your laptop to Paper Size: Envelope #10
- Print the envelopes.
- Write the team member’s name on the back of the return-donation envelopes while the envelopes are printing.
- After the envelopes have printed, in the document, click “File” and “Move to Trash” to make sure that our Drive is not crowded with letters.
- Match up envelopes with the correct fundraising letters as they might not be in order.
- Package letters, return envelopes and advocate fliers (if they were included).
- Add a stamp to each envelope.
Finishing Touches
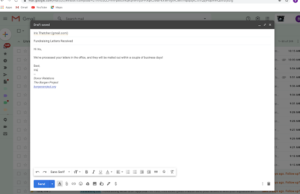
Email team member with “Fundraising Letters Received” canned response* from donors@, and write “Yes” in the “Notification Sent” column of the Verify Doc.
Issues with letters
If the team member did not send a list of potential donors, if there is a letter or two for which the list does not include an address, etc., email the team member letting them know the issue using the canned response “Fundraising Letters Received and Need More Information”.
Save the letters on the shelf next to the printer labeled “Need Info” and write the team member’s name and issue on the sheet included on the shelf. Make sure to be on the lookout for a response from the team member so that you can go back and complete their mailings. The responses to your emails will be labeled with your name.